Introduction
In this guide, I will explain the installation and setup of the DVWA which stands for Damn Vulnerable Web Application. As the name implies, DVWA is a vulnerable web server which is designed to allow us to practice web application testing. There are various levels of difficulty to try and a structed menu where you can practice different types of security vulnerabilities. Some, if not all of these issues will come up in the OWASP top 10 so a good place to build up familiarity with concepts. Essentially this is a web server which is a pen testing lab for web application testing. If you want more information then checkout the following Github repository; https://github.com/digininja/DVWA
Contents:
Pre-requisites to install DVWA
1: Download DVWA
2: Configure DVWA
3: Update/Install MySQL
4: Configure MySQL Database
5: Update/Install PHP
6: Update/Install/Configure Apache Server
7: Conect DVWA via web Browser
8: Optional Video tutorial
Pre-requisites
Virtual machine with Kali Linux [server] up and running
1: Download DVWA
Before you begin, ensure your repositories are all up to date – general good practice to get into
sudo apt-get update && sudo apt-get upgrade -yWe need to move into the /var/www/html directory. This is where Localhost files are stored in Linux systems. Launch a Terminal session (CTRL+ALT+T) and change into this directory with the command below.
cd /var/www/htmlWe need to make a clone from the Github repo
sudo git clone https://github.com/digininja/DVWAWe can check that contents of dir were downloaded correctly by checking that the source code files cloned as intended
cd ~/DVWA then ls -laOptional: Rename the folder for easier referencing
sudo mv DVWA dvwa
2: Configure DVWA
Permissions on the folder need to be updated for use. Execure the following command;
chmod -R 777 dvwa/
Next, we need to set up the user and password which will be required to access the database. We need to move into the right directory;
cd dvwa/configIf you run the ls command, we can see the files within the directory. You should see the config.inc.php.dist file. This file contains the important default configurations. As a precaution we will make and use a copied version instead of this original file. We will name the copied version config.inc.php and the original config.inc.php.dist file can be used as a backup if needed.
sudo cp config.inc.php.dist config.inc.php
We can now open our copied version of the file with nano editor and make some changes. We will set db_user as user and db_password as pass. You can name these values as you like but you’ll just need to cross reference your names if different to this guide.
sudo nano config.inc.php
Save the file (Ctrl + O, then Enter) and Exit (Ctrl + X).
To setup the relevant packages, you can either use the XAMPP stack. This is probably the easiest option – it is an Apache distribution for Linux. The other option which I will cover in this guide is to install/configure individual packages. If going with the first option of the XAMPP stack, then download and unzip dvwa.zip from the Github repo, place the unzipped files in your public_html folder, theninput the following in your web browser; http://127.0.0.1/dvwa/setup.php
3: Update/Install MySQL
It is possible to use MariaDB but we will be using MySQL, which should be already installed in Kali. You can confirm this by checking which version you have;
mysql --versionIf you need to install it you can run the following command
sudo apt install default-mysql-server
4: Configure MySQL Database
We need to start the MySQL service
sudo service mysql startWe can check the service is running using the status check
systemctl status mysql
Login to the MySQL database as root or relevant name in your case if you have changed the superuser name. You will initially enter your sudo password and then you will see another password prompt which is actually referring to the database. Since we haven’t set a password yet, it is possible to simply press the Enter key
sudo mysql -u root -pLet’s create a new user with the username and password we set in our DVWA application configuration file earlier. In this guise, the username was ‘user,’ and the password was ‘pass.’ The server we are using is Localhost which can also be referred to as 127.0.0.1
create user 'user'@'127.0.0.1' identified by 'pass';
This new user needs to be granted privilege over the DVWA database, so we need to use the chmod command
grant all privileges on dvwa.* to 'user'@'127.0.0.1' identified by 'pass';
5: Update/Install PHP
PHP should come already installed in Kali. If you need to install it then copy the following
sudo apt install php7.4 -y
#TIP: Note that the version will change in future so you will need to check the most recent version available. We can use the following command in APT to find the most recent version of package and then install it
apt search [application_name]You will be shown a set of results and then you just need to copy the application name syntax for the version you see fit and then replace the above command with install instead of search
6: Update/Install/Configure Apache Server
We need to configure the server, which in this guide we are using Apache. We need to change directory on the Terminal
cd /etc/php/7.4/apache2
Within this directory, there is a file called php.ini. You can view the file if you enter the ls command. We need to edit this file using nano text editor to configure out localhost server
sudo nano php.iniNavigate using the arrow keys and look for the following two lines: allow_url_fopen and allow_url_include. These should both be set to ON. Once complete, Save the file by Ctrl + O, then press Enter and Exit by Ctrl + X.
We can now start the Apache web server [service]
sudo service apache2 start
If you want to check that it is now running, enter the following command
systemctl status apache27: Conect DVWA via web Browser
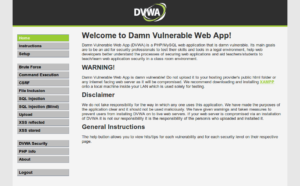
We should now be ready to use DVWA! Open up your web browser and point to the URL. We use localhost as we are trying to connect to an address which is also self hosted i.e. the same machine
http://127.0.0.1/dvwa/
 or http://localhost/dvwa/
This will take you to the default page which has the following path of setup.php
Note: If using an Ubuntu server, you can’t access this URL locally. You need to use another computer/VM on the same network instead and enter the IP address that appeared for your Ubuntu server network adapter in the URL field.
You can now click on ‘create/reset database’ which will do exactly as it states. If there is an error message then pay attention to the error message as this will provide some guidance as to what action needs to be taken.
To access the database, the username is admin and the password is password
Once inside the database, you can change the difficulty level from it’s default which is ‘impossible’ to level appropriate for your skills.
I hope you found this guide useful. If you prefer to watch a tutorial of this setup then check out the video link below!