How to setup an Active Directory Lab

Introduction
In this article, we’ll walk through the creation of setting up your own Active Directory lab environment. As long as you have a machine capable of running a virtual machine then everything will be completely FREE! It’s possible to replicate this setup in a cloud environment but this scenario won’t be covered in this guide.
Pre-requisites — what will you need to have available?
– A machine capable of running virtualisation technology so you can run a Virtual Machine on top of the host operating system (enabled in the BIOS if available). The specification will differ based on your needs (how fast you want your machine and what you physically have availble or willing to buy if needed). It’s also worth checking the machine requirements for your chosen virtual machine which will be available on the vendors website (Virtual Box, VMWare or Windows own verion — Hyper-V). I’ll be using a machine with 16GB RAM as I find 8GB too slow. My host OS is a Windows 10 Pro machine.
Timing varies but allow yourself 2 hours which will provide a comfortable pace allowing you to make additional notes and review your setup. A good amount of time is spent waiting for the installation to complete so there’s plenty of coffee break opportunities! The speed of your machine will also have an impact on timings.
Downloads
We will need to download the following files for this particular setup;
VirtualBox | Windows 2019 Server | Windows 10 Client/Workstation
*VirtualBox — select download relevant to your host OS under platform packages and also download the VirtualBox 7.0.6 Oracle VM VirtualBox Extension Pack (allows additional configurability)
Guidance notes
– Where you come across any options that aren’t specificially mentioned, the idea is that you can proceed with the default options i.e. click Continue or Next as applicable.
Step 1: Setup Windows Server 2019 virtual instance on VirtualBox
Once you’ve installed VirtualBox, you can follow the steps below;
– Select the option New to create new virtual machine instance
– Name it “Server2019_DC” or something similar. Amend the menu options for Type and Version to match our OS if not automatically reflected
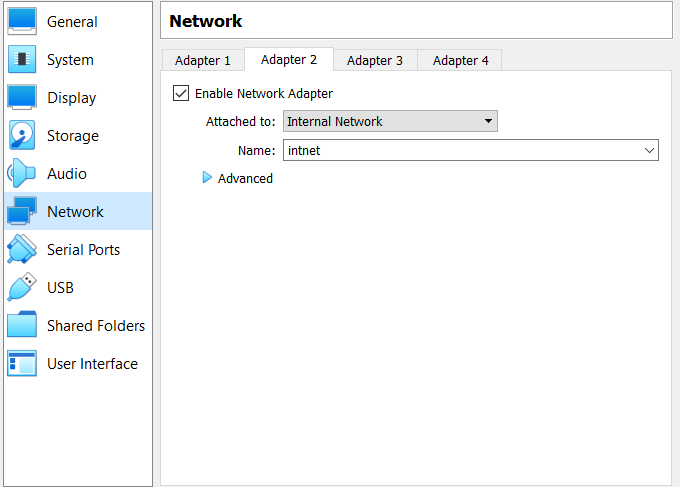
Settings: CPU and RAM can be set to around 25% of physical/host machine | Network adapter 1 is our NAT (connect to home router) which is setup by default | Network 2 will be our Internal network: Tick the checkbox to enable adapter 2 and select Internal Network from the dropdown menu
Attach Virtual Operating system — Windows 2019: Double click to open the VM instance | select folder icon to select OS | Add | select the Server OS (based on where you downloaded the file)
The Virtual machine instance is now complete. Now exit the current menu and select Start to start the Windows 2019 server installation process
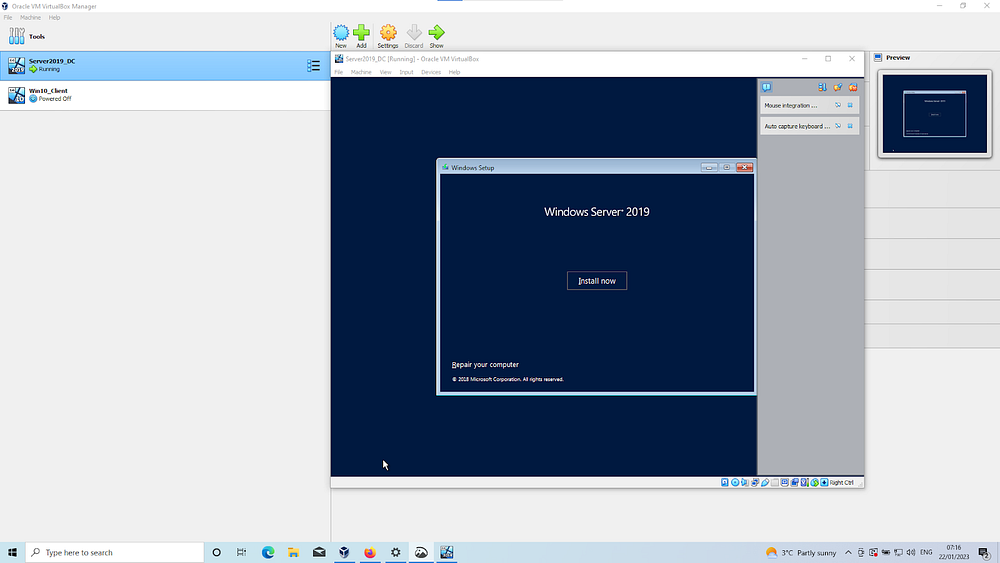
Step 2: Windows Server 2019 installation
Once you start the virtual machine, click Install now/Next/continue until you reach the option for the ype of Windows Server.
Server type: Standard Evaluation— desktop experience | Custom install (unless you had a variation of a server installed already) | The server installation process will keep restarting itself
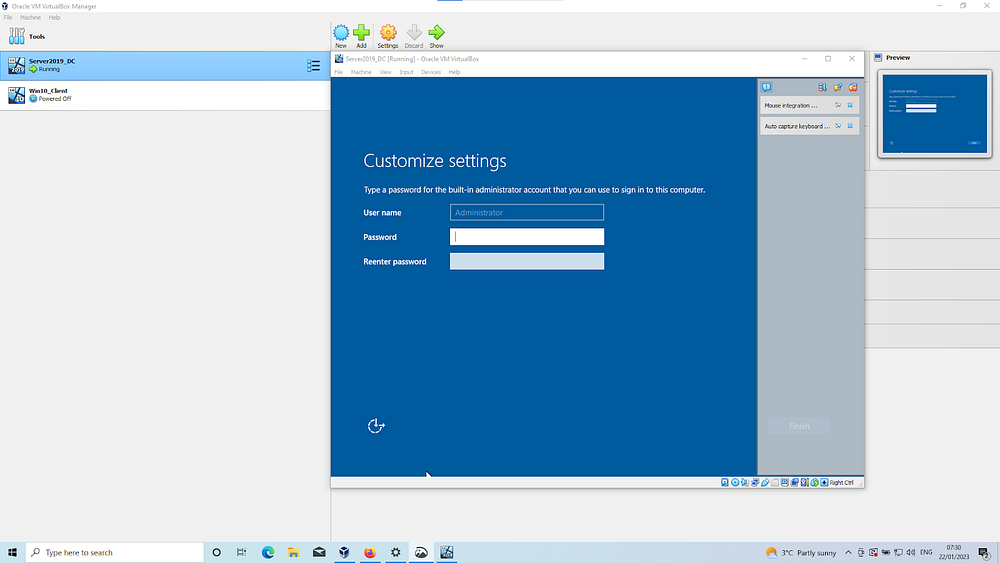
Settings: The default Administrator account will be created so you’ll be prompted to create a password which needs to be added and noted for later use
Login: You’ll be presented with the login screen when ready. To interact with the virtual machine, you need to “send” CTRL+ALT+DEL via the instance options: Input > Keyboard (as it’s inside a VM)The virtual machine screen will be small by default. To make the screen larger: Devices > insert guest additions > select the install file > reboot > resize as needed (one reason why we installed VirtualBox 7.0.6 Oracle VM VirtualBox Extension Pack)
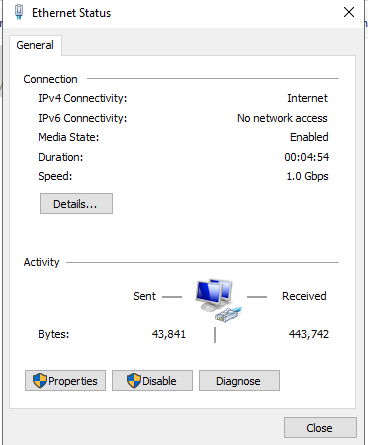
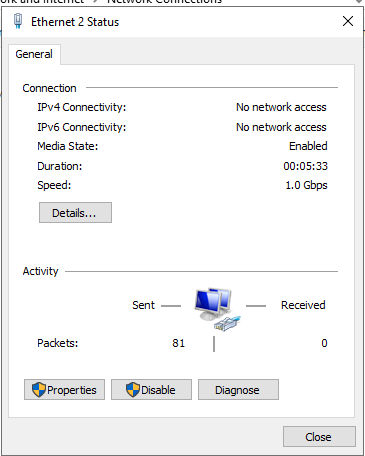
Network setup: Click the network icon in the Taskbar | Select the connected network and change adapter option | There will be 2 NIC’s so you’ll need to identify which one is connected (to the internet) by comparing the in/outgoing packets
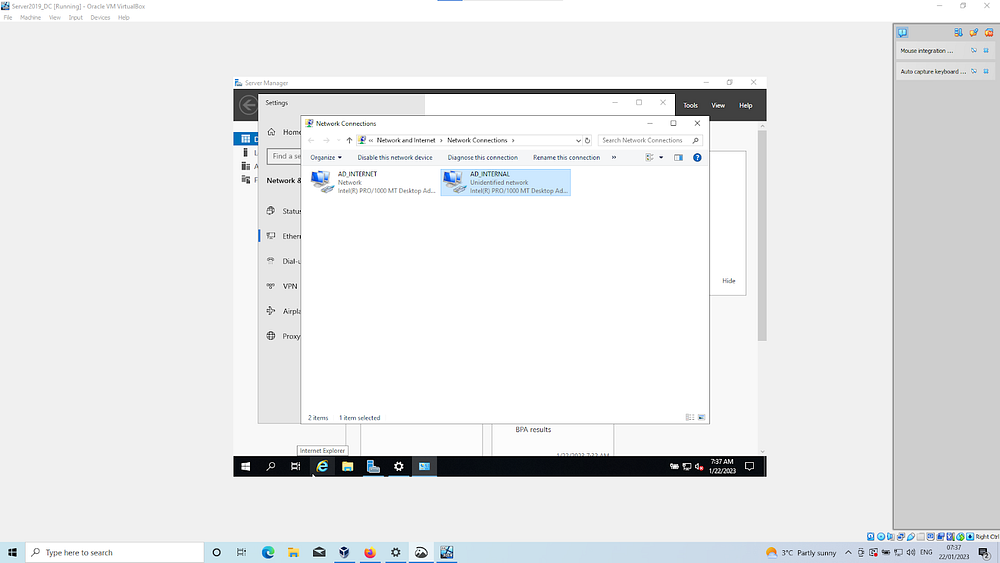
Rename the NIC Internet | check and Rename NIC 2 and name this Internal | Assign a static IP for this Internal NIC; Properties, IPV4 settings, we’ll set our static IP to 172.16.0.1/24 | Gateway address not applicable as this is our internal NIC | DNS setting will be itself so use the Server IP address (172.16.0.1) or use the loopback addres 127.0.0.1
Rename PC: as DC via System, Settings | Once complete, restart the machine for setting to take effect
3. Setup Active Directory Domain Services
Add Active Directory Domain Services: Select Server management, Add roles & features | select AD DS — Active Directory Domain Services | install until options complete
Create Domain and Domain Controller: Using the warning indicator (top right hand menu bar), promote this Server as the Domain Controller | Add new forest | Provide a name for your new domain [techbeatz.co.uk] | DSRM requires a password which you’ll need to set | Restart the machine | Newly created domain name should appear upon login screen | You’ll notice the new domain name in front of the username in command prompt: enter whoami
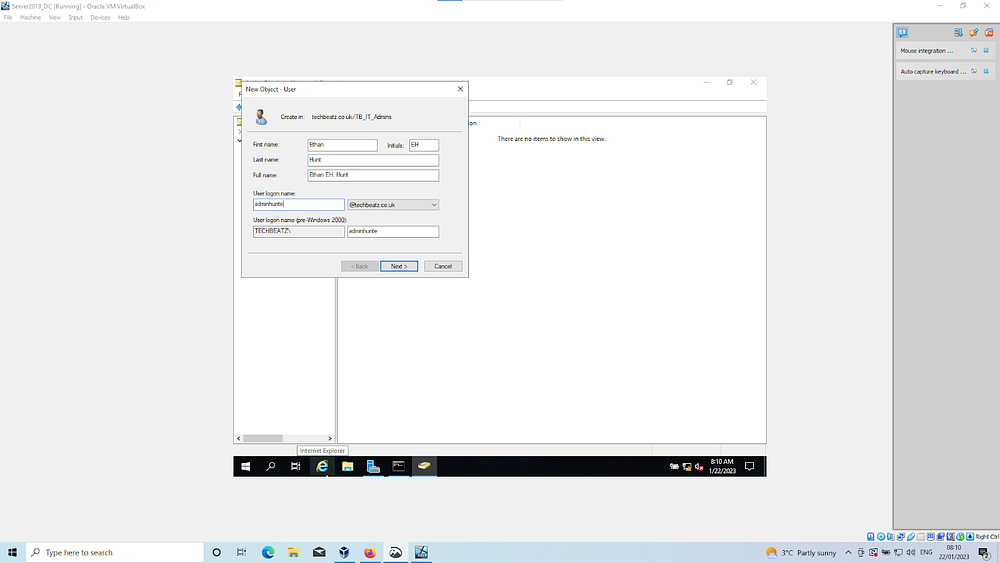
New Admin account: we have the default Administrator account but we’ll create our own Administrator for practice purposes. Select domain | New OU | Name it _Admins | create Admin username | select a password and check the option so it never expires which should be the only box ticked
Make user an admin: Select user | Member of | domain admins | Select Apply | Sign out and login again as the new admin user | You may need to click on other user to change the current user.
Create additonal admin/standard users: Same process as above
4. Setup networking infrastructure
We’ll configure our two NICs so that the Client machine can connect to our Active Directory domain (Internal netowork) and use our Server/DC to also connect to the Internet, essentially using the DC as an internet proxy. For security purposes, we wouldn’t normally provide an internet connection to a server unless it was fundamentally required i.e. a web server, however this is a lab environment for testing purposes. We will add RAS to provide this functionaility.
Within the Server manager, Add the role Remote Access | continue with defaults ensuring Routing checked

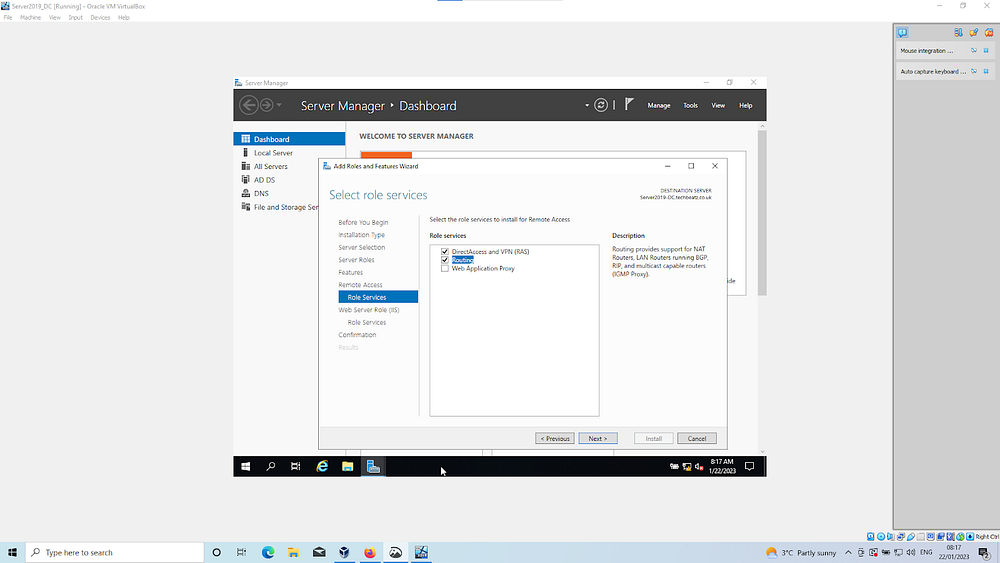
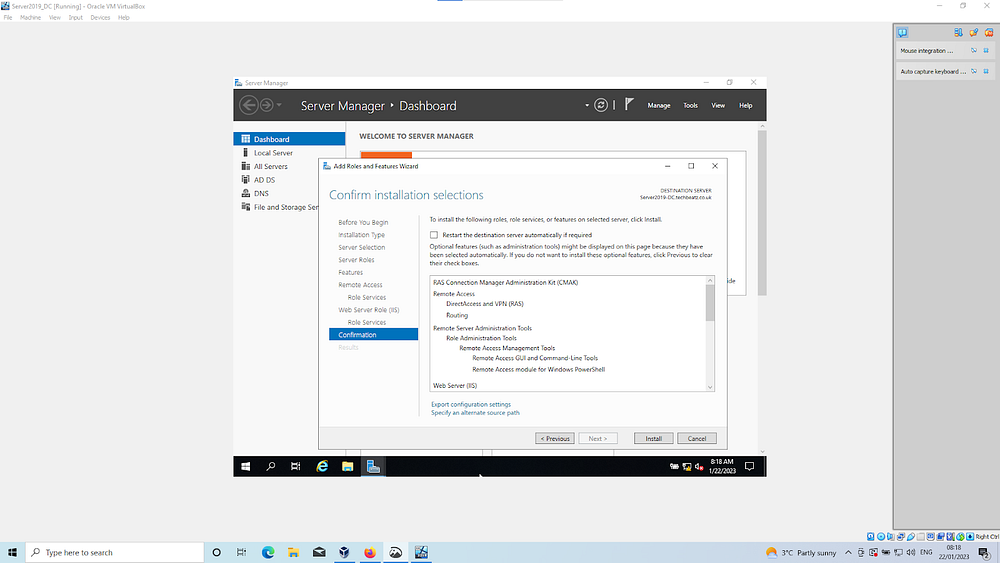
Select the Remote access tile on the Server manager dashboard | right click to open: configure and enable | install NAT — Use this public interface to connect to the internet
Note: if option above doesn’t show then try again and access via; Tools > Routing > DC local > configure | select INTERNET interface. Also if service issue with R&RA then port might need to be opened on Windows Firewall
5. Setup DCHP server
We want to use our DC as the DHCP server. This service will provide network configuration to domain joined clients.
Click on DHCP > right click the Server > select DHCP manager > Click your server drop down > Select IPV4

Follow the wizard instructions;
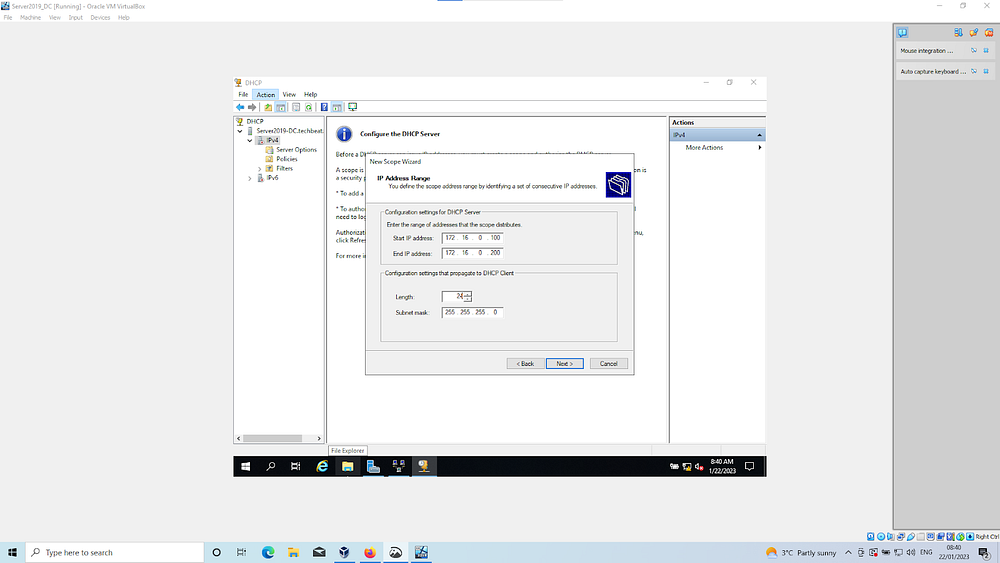
Seeting means new domain joined clients will get an IP address between 172.16.0.100–200. The rest of the IP space will remain unallocated so it can be used to assign static IP addresses if needed
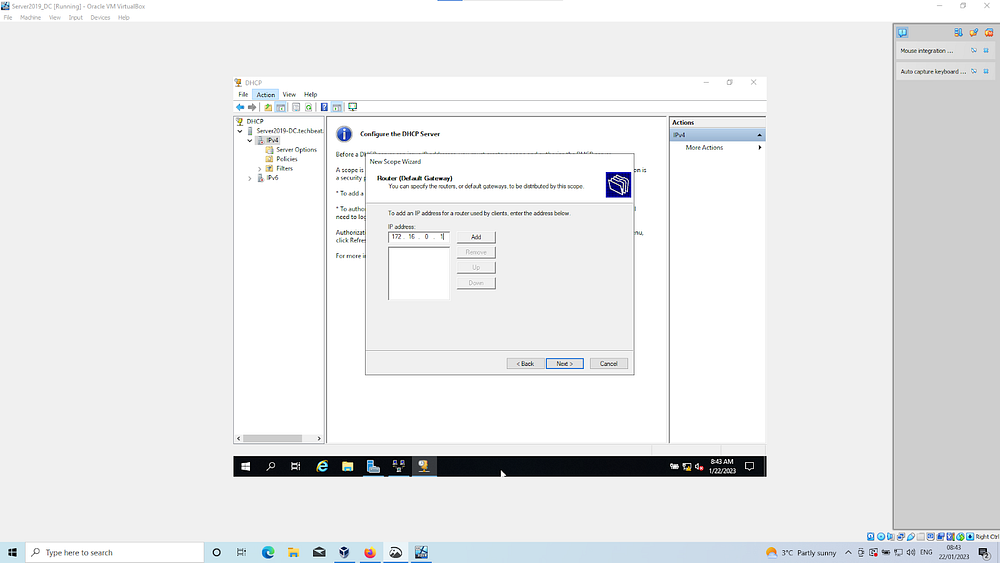
Router Default Gateway will be via the Internal NIC of DC, so input this IP [172.16.0.1] & click Add | Select domain under DHCP and click authorize | IPV4 option should now contain a green tick
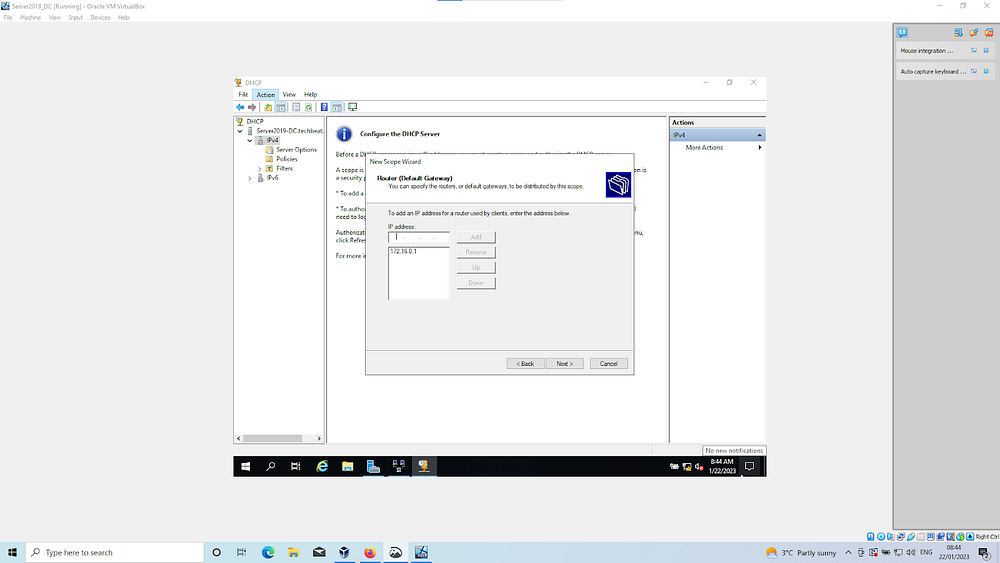
Warning: Make sure you click Add as you can still proceed without doing so which will cause an error later!
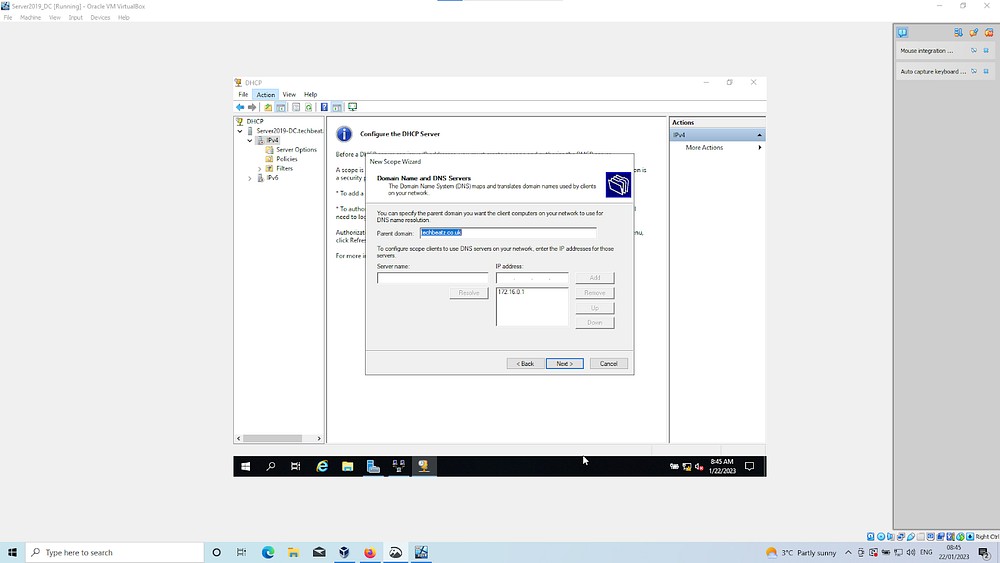
Clients will use our Server as the DNS (otherwise you would configure here if your needs are different)
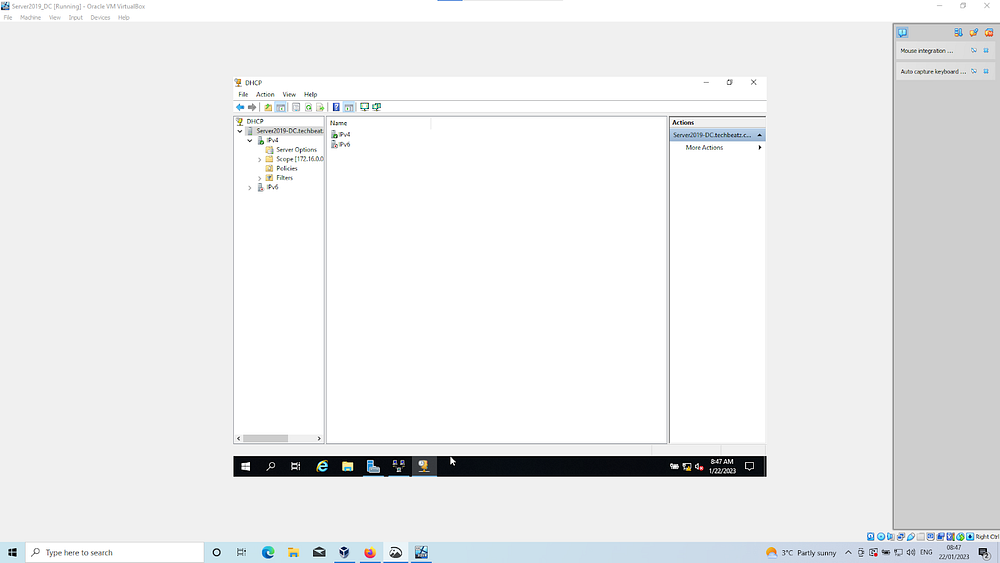
You should see a green tick in the IPV4 option. If not then refresh, if still not showing then right click the your server domain as pre-selected above and select Authorize. Refresh and this should update with a green tick
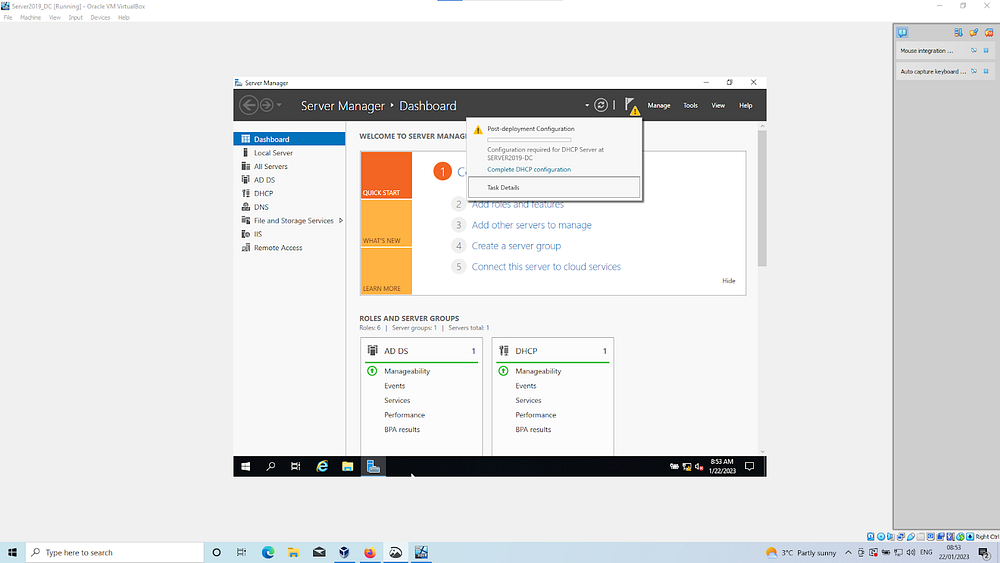
6. Outstanding alerts to action
Check any alerts and action with the support of any wizards
In my lab, I need to select a user/admin to authose the DHCP server for security purposes. Your lab instance may/may not have the same warning, depending on your configuration up to this point
7. Create Windows 10 client and change NIC adapter
Now we’re ready to create our Windows 10 client/workstation and then we’ll connect it to our Active Directory Domain.
Setup a virtual machine instance, attach the relevant windows 10 ISO file and carry out the installation steps in very much the same way as we did for the Server
The Windows 10 client able to reach internet as it’s connected to a default NAT network given by VirtualBox (this obtains the relevant IP configuration from your home/physical router’s DHCP service). We need to change this network setting to that it points to our Internal NIC adapter | Settings: Network change to Internal Network | the clients will obtain the IP address details as per our confguration carried out earlier
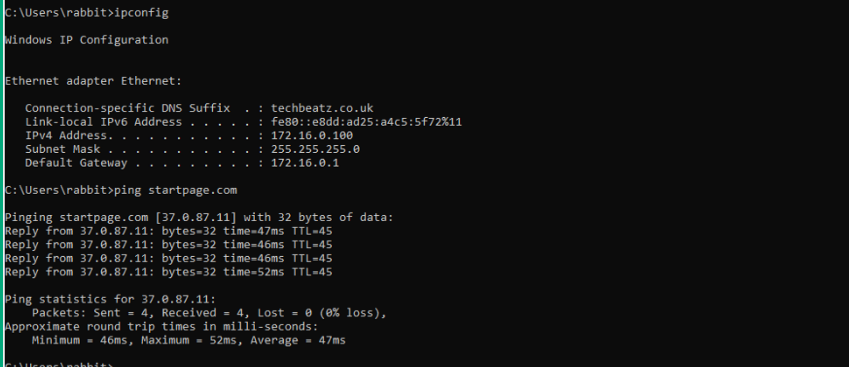
To check that the Windows 10 client has connected to our DC and obtained the IP details using our DHCP server: we can check by running ipconfig in command prompt. The settings should replicate the following (subject to copying my tutroial)
Adapter type: Ethernet
Connection specific DNS suffix: [this should be your domain name]
IPV4 address: [an IP between the IP address pool we set]
Subnet mask: [mask we applied which was a /24 subnet mask]
Default Gateway: [we set this to the DC static IP address]
To ensure we can reach the DC DNS and connect to the internet: we can run a ping command on a website like startpage.com. A successfull connection should return echo reply packets
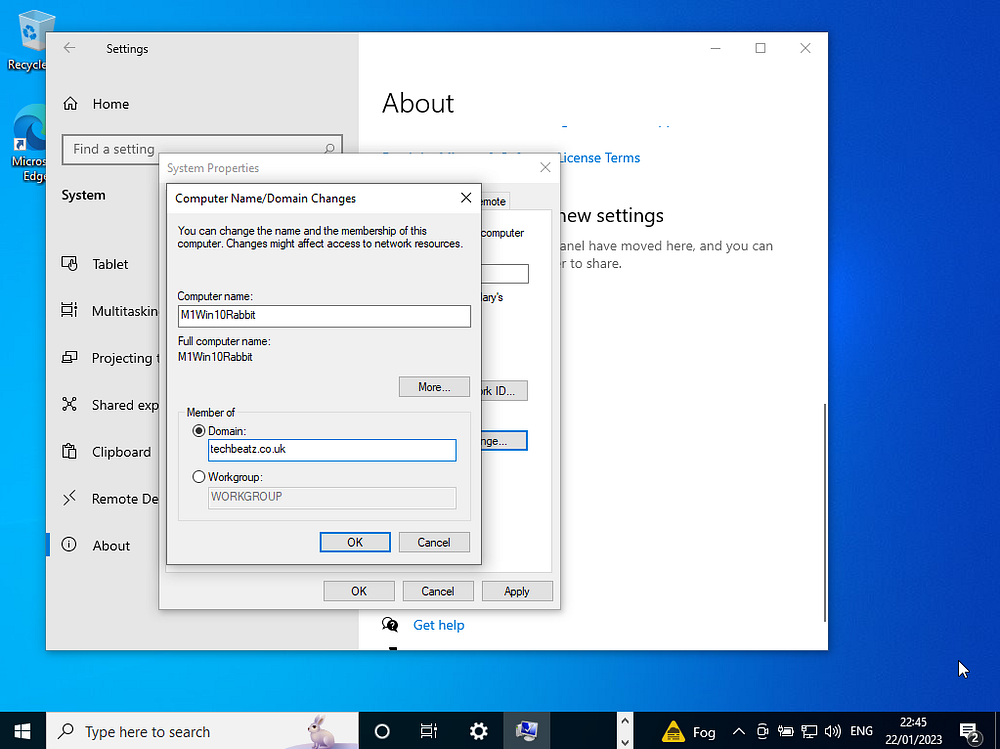
8. Join win client to server domain
We’ve connected to the Server using the NIC but we haven’t officially joined the domain. We need to rename Windows 10 client and then request to join the domain. We can achieve both at the same time
Rename the machine via Settings, About then Rename (advanced) | enter computer name and enter you domain name | enter credentials to approve the request (usually a domain admin account required)
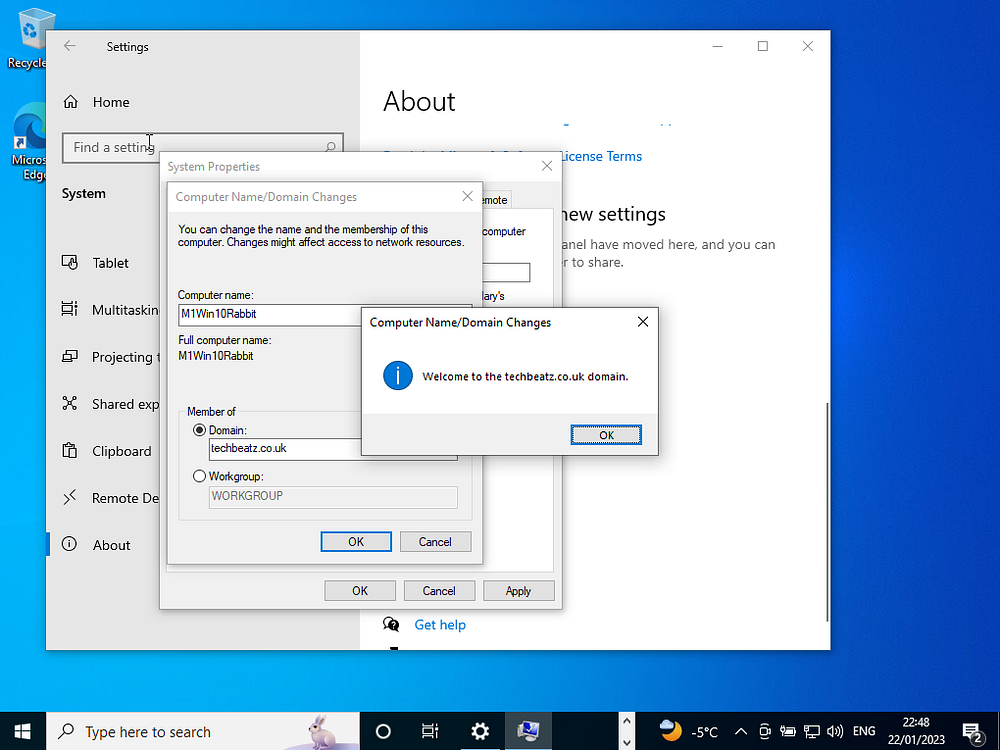
Note that no actual users (except the admin user) created on DC yet. This means we’ve joined the machine to the DC only. This permits any subsequent domain users to login via this machine. Apply settings and restart the machine to take effect
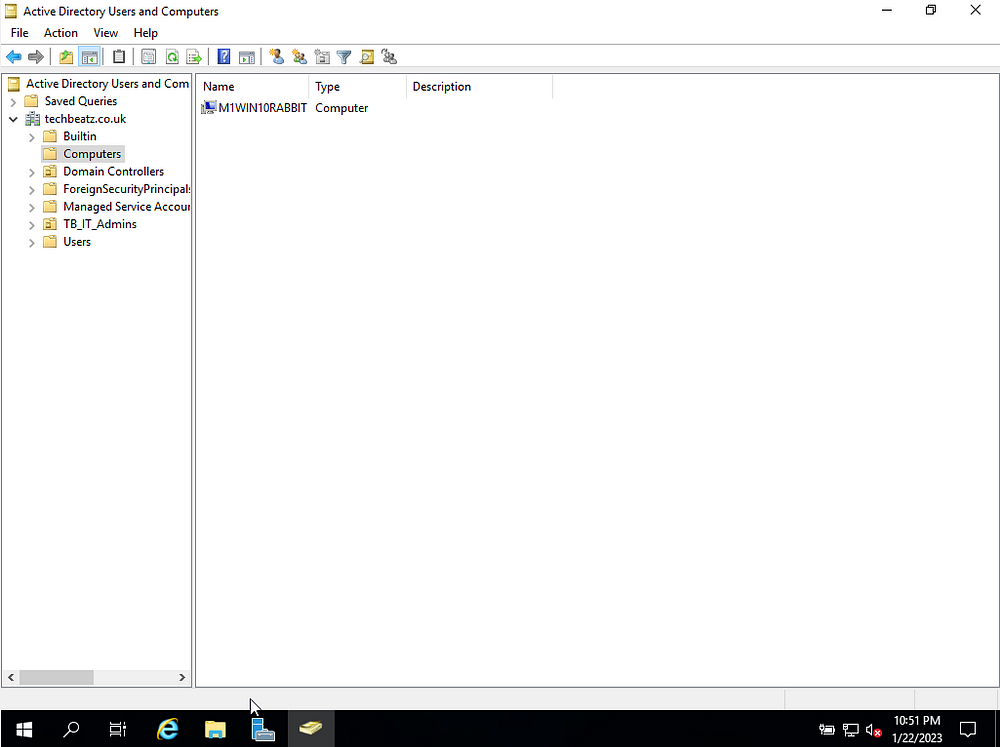
We can check/correlate the join in the Server. Access the setting in Active Directory Users & Computers (now you’ll appreciate why this option is named like this as you can join users OR computers in isolation). We can see the machine we just renamed appear in the Computers setting.
Currently when logging into the Windows 10 client machine, our login appears as follows;
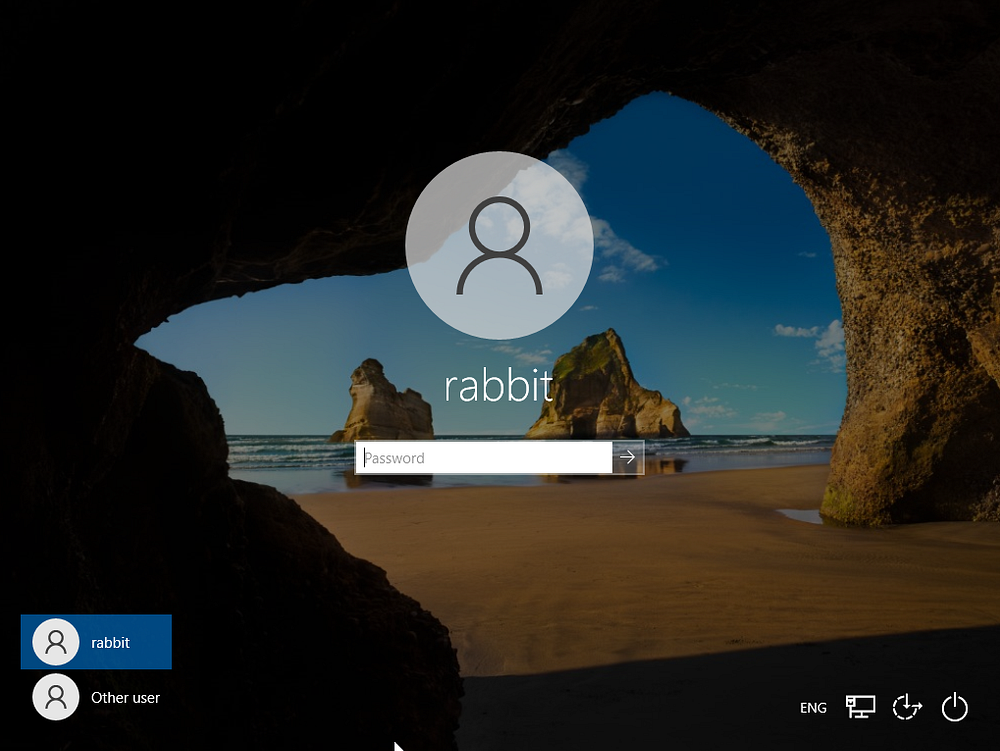
This is how any user could login to the machine using a locally created account (which was done during the installation process). When logging into the domain using a valid username (created/known to the DC) we will see the relevant domain here.
We will login using the admin we created (currently logged into the DC as well) as this is a Domain recognised credential.
Select Other user to sign into a different domain | Enter Domain using the following convention: name/username i.e. techbeatz\administrator
Note: when you enter the domain followed by \ you’ll notice a prompt asking if you want to login to that domain
To sign into the local machine itself (not domain), the convention is machine name/username so my setup would be M1WIN10RABBIT\rabbit
We’ve now logged into our Windows 10 domain joined computer using an admin/user known to our Domain Controller. If we power down the Server DC, we notice a netowork connection outage when we try to ping an IP address. Thus proving the DC is our network proxy as intended.
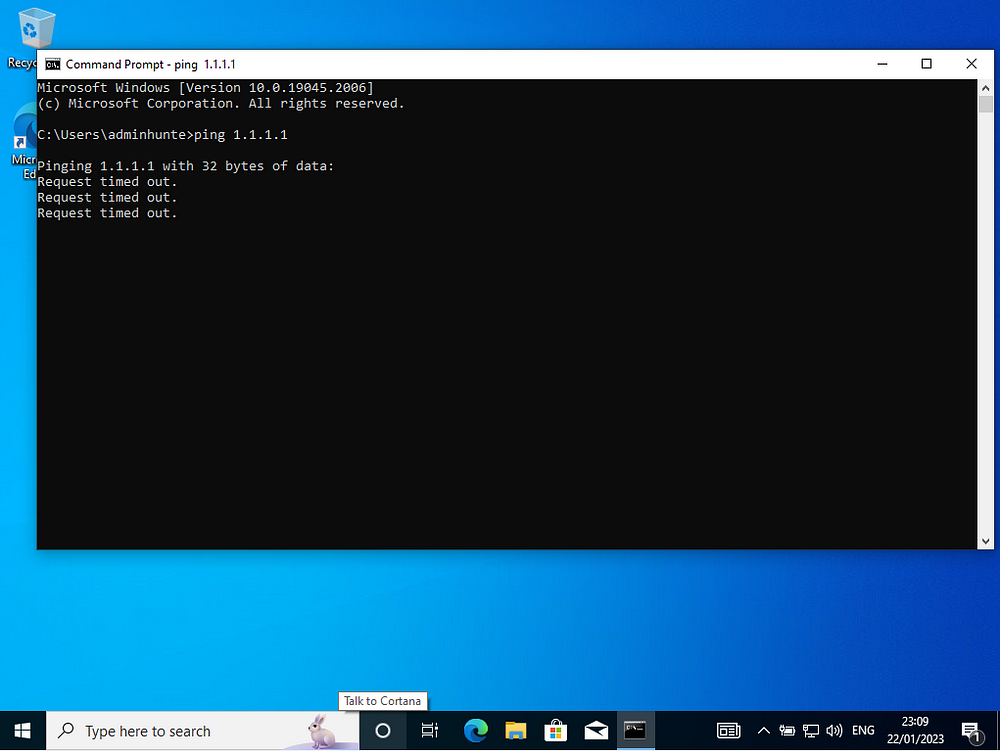
Notice how we have a network icon however cannot reach the internet. The icon only confirms that an adapter exists but not that it’s necessarily working — this is because we turned off the DC so it cannot reach the route it needs to access the internet. Once we turn the DC back on and the relevant services have turned on, the connection will be restored.

Well done — we have setup and tested a live working Active directory infrastructure! Feel free to provide any feedback to improve this guide, otherwise share this resource to anyone else that may benefit.
Leave a Reply
You must be logged in to post a comment.